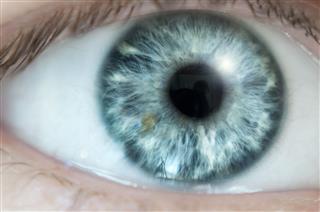
With the help of Photoshop, you can change someone’s eye color using a Hue/Saturation adjustment layer. Confused as to what that is? Read the PhotograFeed article for a step-by-step explanation.
Photoshop at its best
Photoshop at its best After seeing her Dior ad, Jennifer Lawrence made an honest comment saying, “I love Photoshop more than anything in the world. Of course it’s Photoshop; people don’t look like that.”
Photoshop is a professional and technically-advanced software for editing digital photos. You can easily retouch photos, or completely alter the appearance by using the Photo Retouching tool.
A Step-by-step Guide
As you go through the instructions given below, make sure to check the images provided as well. This will help you understand which tools are to be used while working on your project.


- First of all, open the software, select the picture.
- From the Tools palette, choose the Zoom Tool, or you can even press the Z on your keyboard to zoom in on the eye.
- From the PS toolbar, select the Ellipse tool. Point the cursor at the center of the eye while holding down ALT + SHIFT keys, and drag to select the eye.
- From the same toolbar, select Quick Mask Mode. This will change the entire picture and add a temporary background color while isolating the eye that was selected.
- Now select the Brush tool and choose a “soft brush” option of Soft Round 3 pixel.
- With the Soft Brush tool, brush the missing eyelid to match the natural looking eyes.
- Zoom in and match the correct arc of the eyelid.
- Go back to the Quick Mask Mode and click on it. This will bring back the original picture while keeping the area selected.
- Create a new layer from the window on the bottom right corner, and click on the Color Picker option.
- Choose the color that you like, and press OK.
- In a new layer, fill the selected color from the PS toolbar. This will fill the color covering the selected area.
- From the menu bar, click on select and choose Inverse option.
- Again go to select option and choose Modify → Feather. This will open the Feather Selection box where you will choose 5 pixels, and click OK.
- Hit the delete key twice.
- From the bottom right corner box, click on the arrow next to Normal which will open a list and set the Blending Mode to color.
- Now go to Image option, select Adjustments → Hue/Saturation. This will open the Hue/Saturation box. Click on the check-box for Colorize and Preview. Here you can change the hue, saturation and lightness setting in order to obtain the color you want for the eye.
- Play with the variety of colors like blue, green, black, and many more. Select the one you like, and press OK.
Changing eye color in Photoshop is not so tough once you know how to use the software. After you’ve learned the basics, you can upgrade any picture and make as many alterations as you like.


